
This article originally appeared on Your Wardrobe Unlock'd.
The scaled pattern for the dress is at the end of the article.
Museums are full of inspiring, elaborate, exquisite dresses. But what about dresses of a more everyday variety? We see plenty of these in Victorian photos, but there’s much less of a chance to see them and their construction in person. Or the on the internet, for that matter!
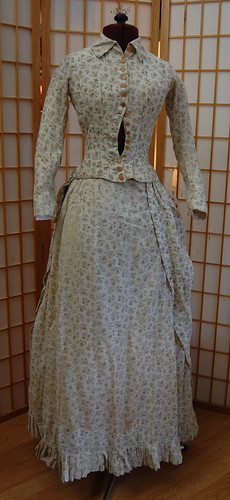
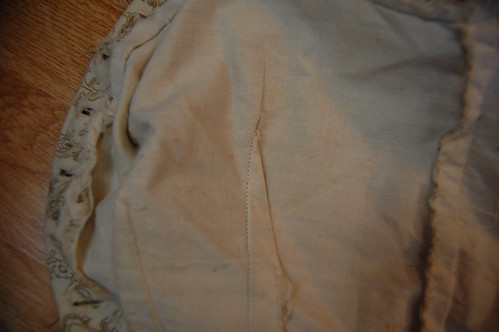
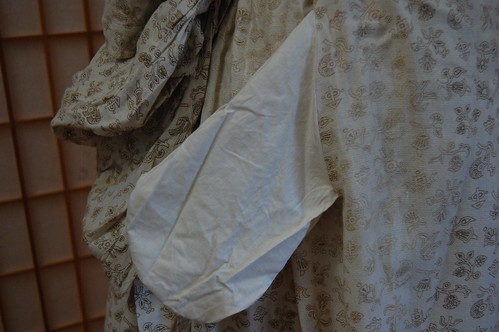
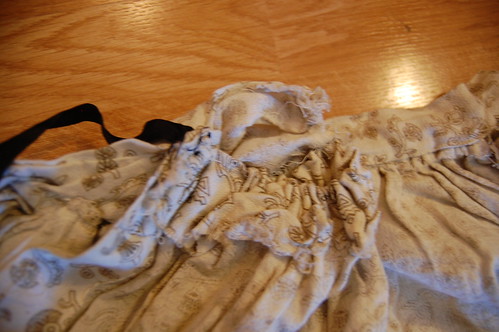
Hopefully, this dress will be of help in the area of everyday clothes. It’s a complete—or nearly complete—bustle dress from the 1880s. It’s well worn, as the repairs, loose stitches, and general wear marks show, and made of an easy to take care of cotton fabric. Though well made, it lacks some of the finer details of dresses that have made it into museums—there is nothing about this dress that puts it out of the range of capability of the typical seamstress or costumer.
Dress
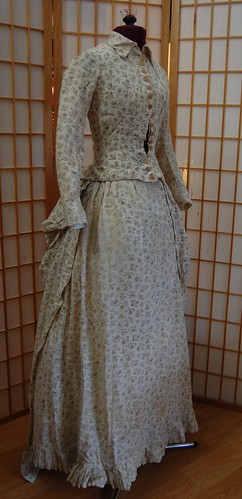
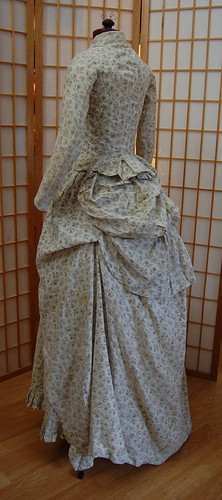
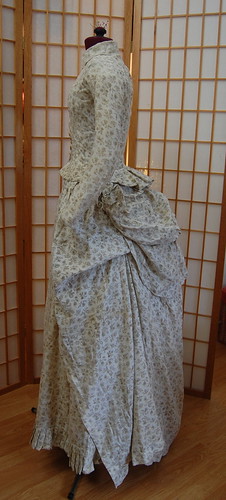
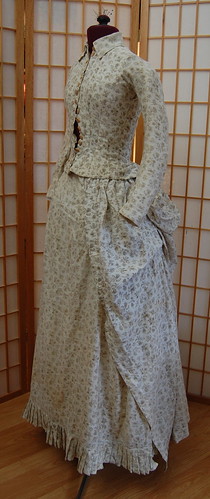
The dress has a bodice, skirt, and asymmetrical back drapery.
The dress is made of a lightweight, semisheer, cotton fabric with a fine textured weave. The body of the bodice is lined with a plain weave, lightweight white cotton. The skirt, overskirt, and sleeves are left unlined.
The dress is almost entirely machine sewn. All of the seams and the hem are done by machine. It has a small amount of hand finishing, including the bodice seams, hanging loop, collar bias, finishing the cuff seam. In addition the skirt is sewn to the waistband by hand, and the piecing at the upper end of the skirt was attached by hand.
Measurements:
Bust: 32 inches/ 81 centimeters
Waist: 22 inches/ 56 centimeters, with a 1 inch/ 2.5 centimeter overlap for a finished measurement of 21 inches/ 53 centimeters
Neck: 11.5 inches/ 29 centimeters
Back length to waist: 15 ½ inches/ 39.5 centimeters
Total back length: 20 ½ inches/ 52 centimeters
Underarm length to waist: 9 inches/ 23 centimeters
Total underarm length: 11 ¾ inches/ 30 centimeters
Sleeve length: 20 inches/ 51 centimeters
Sleeve opening: 7 inches/ 18 centimeters
Skirt waist: 27 inches/ 68.5 centimeters
Skirt length: 38 inches/ 96.5 centimeters
Skirt circumference: 86 inches/ 218 centimeters
Overskirt length: 44 inches, 112 centimeters
Overskirt width: 48 inches, 122 centimeters
Seam allowances: 3/8 inch to ½ inch on the bodice, ¼ inch on skirts
15 machine stitches an inch
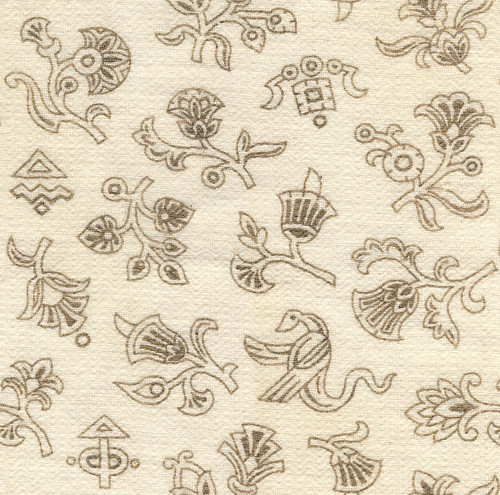
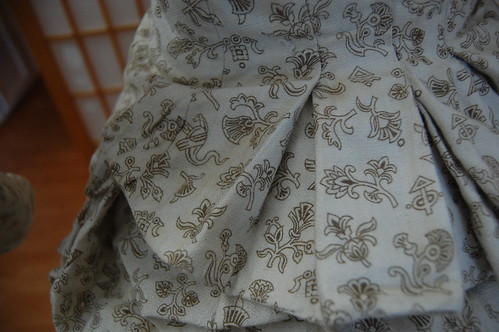
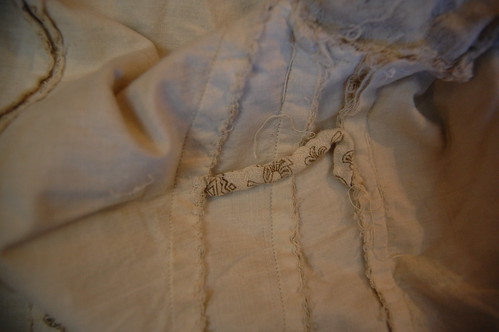
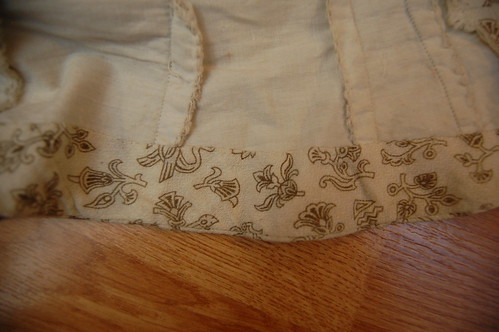
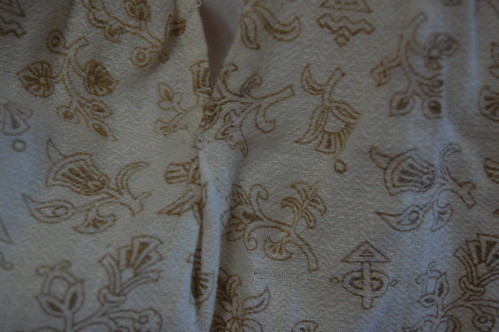
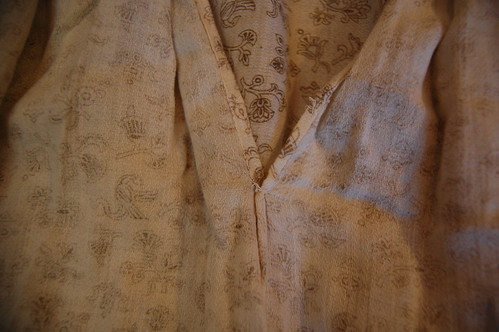
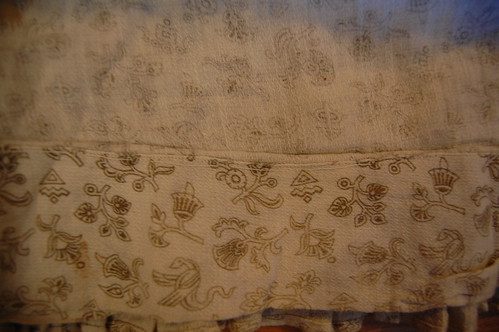
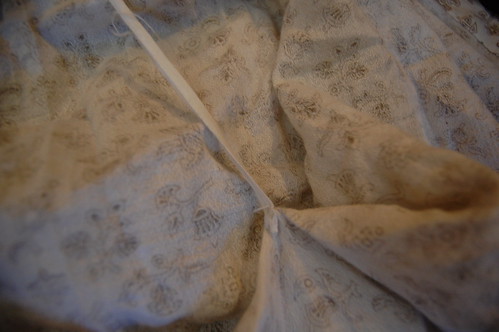
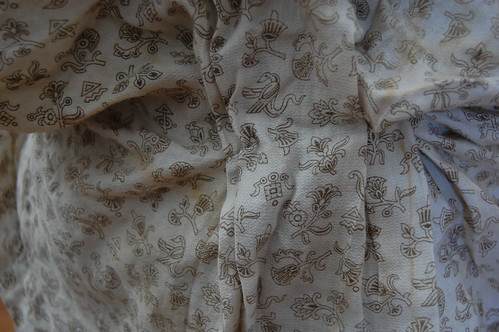
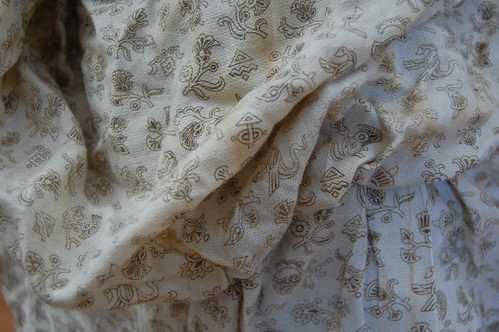
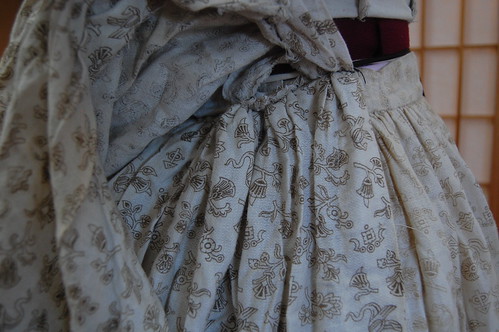
The fabric is cream colored with a design of stylized flowers, arrows, triangles, Asian inspired characters, and a sort of bird with a tail. It’s really quite fantastical, and certainly not what you tend to think of as a typical Victorian fabric. The motifs are quite small and closely spaced together, measuring about one-half to one inch (one to two and a half centimeters) and about half an inch to a quarter (one centimeter to half a centimeter) inch apart. This gives a rather busy effect that hides the whimsical nature of the fabric until you see it more closely.
Bodice

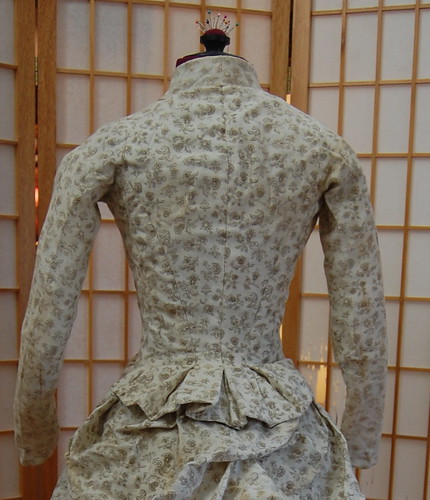

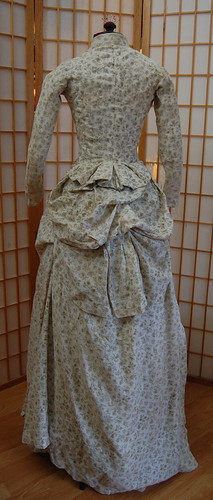
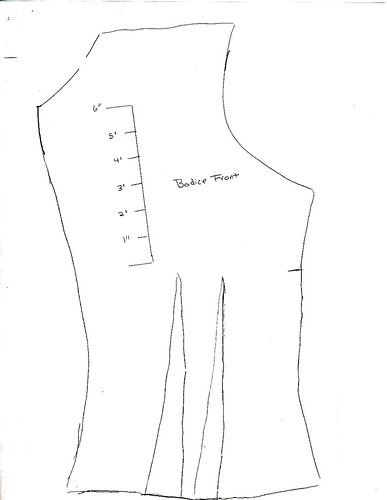
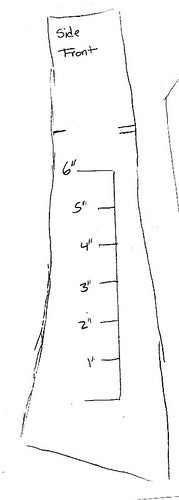
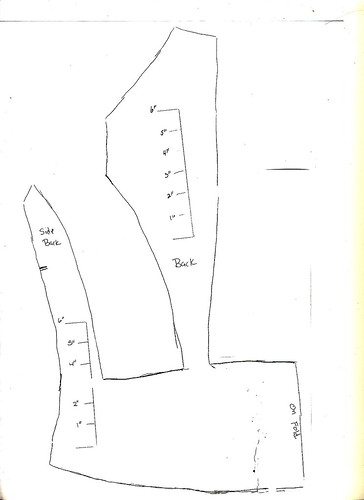
The bodice is made of eight pieces—two darted fronts, two sides, two backs, and two side backs. Each piece is flatlined in plain weave cotton and the two pieces are treated as one. The bodice extends slightly past the waist in front, and ends in a peplum in back.
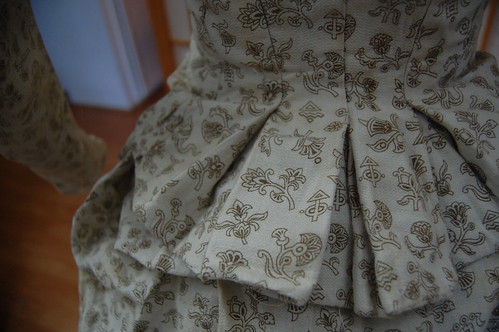
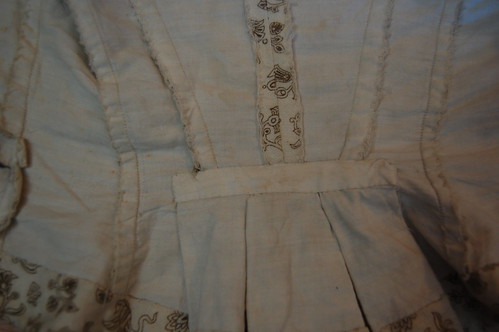
The peplum has no seams. The back pieces were laid out on the fabric a few inches apart and the peplum was cut as one with them. The seams were then sewn slightly past the edge of the peplum. Because of this, the pattern was not cut to match, though the motifs do line up horizontally by default. The extra fabric was then pleated, and the raw edge of the top of the peplum was covered with a piece of cotton tape, which was hand sewn into place.

The center back seam was pressed open and the rest of the seams, including the shoulder seams, were pressed to the front. The seams were then overcast to finish them. The center back seam had each side overcast separately while the rest of the seams were overcast together.
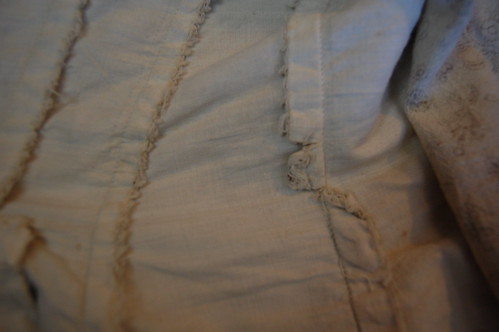
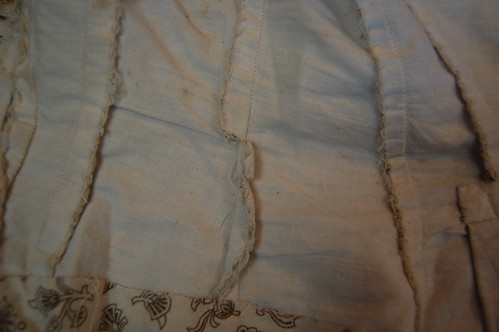

The side seams, which sit over the hips, were clipped twice at the waist to allow the bodice to sit smoothly over the hips. These clips are quite deep, as they end nearly at the seam. The top and bottom clip are one half inch (one centimeter) inch apart. The placket is also clipped at waist level, to allow it to spread over the front waist curve.
There are two darts on either side. They measure one half an inch (one centimeter) at the bottom and taper to a point at the top. The inner darts are nine inches (twenty-three centimeter) long and the outer darts are nine and a half inches (twenty-four centimeters) long, and finished by tying a knot at the top of the dart. The ends of the threads are then cut short.
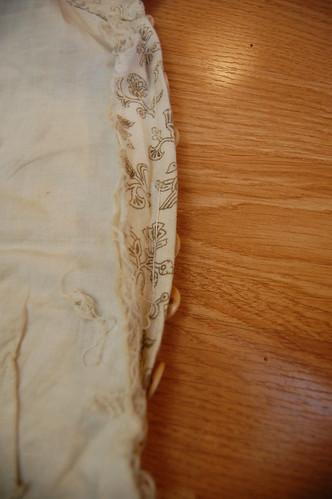
The bodice has a loop of self fabric sewn to the left underarm. This loop is sewn to the seam allowances by hand, and was made by folding a strip of fabric with the seam allowances folded in and using a few large overcast stitches to hold it shut.

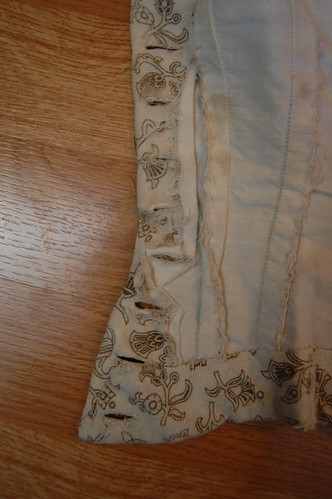
The bottom of the bodice is finished with self bias, approximately one and a half inches (four centimeters) wide. This was sewn after the placket was folded back, but before the buttonholes were done. It was sewn right side to the bottom edge of the bodice, flipped up, and whipstitched into place. The edge along the placket is folded in at an angle so it doesn’t show from the right side, and whipstitched down.
Closures
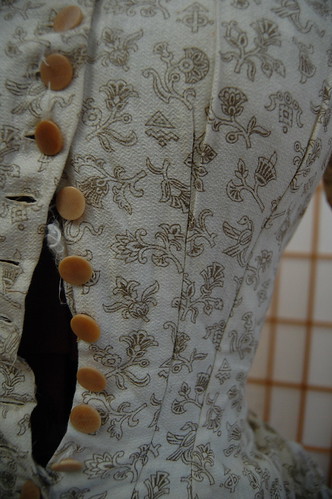
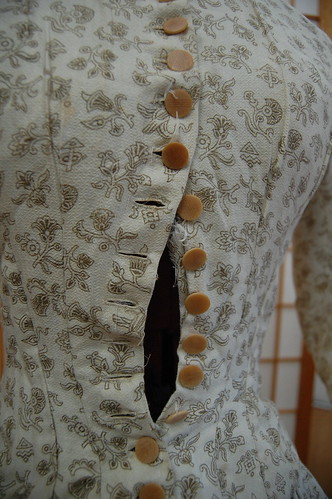
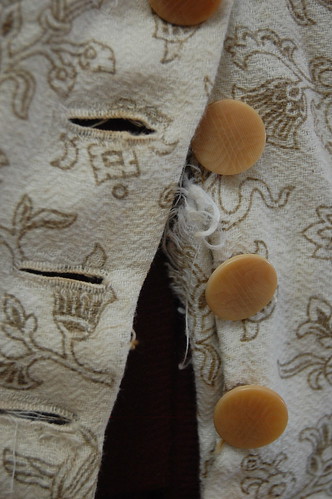
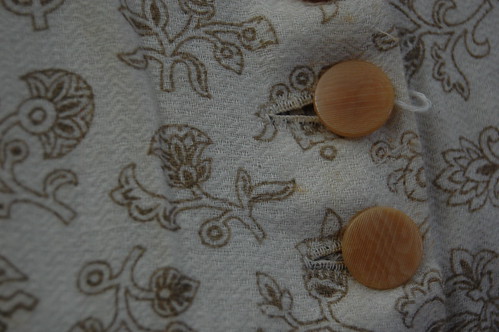
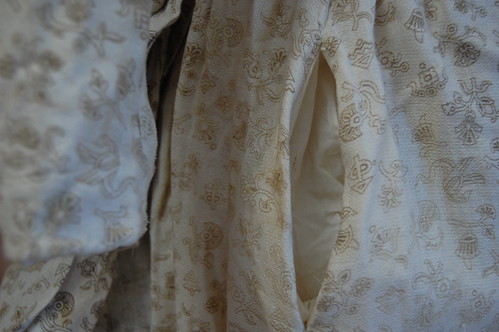
The bodice closes with 17 buttons and hand sewn buttonholes. The placket is very simple. It was folded back, snipped to accommodate curves, the edge was left raw, and left unsewn—only the buttons and buttonholes keep it in place. Over time it has unraveled slightly and the free edge has rolled so that it folds over the front a little.
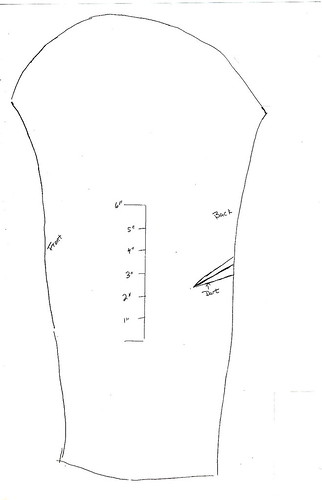
Sleeves
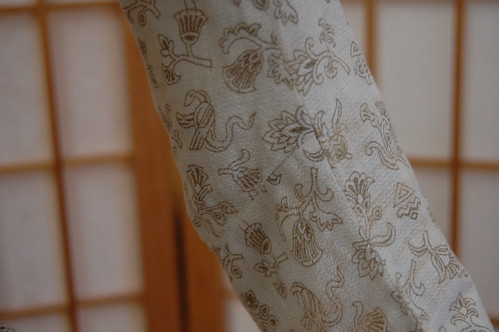
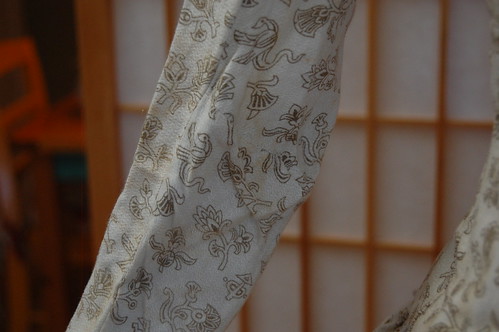
The sleeves are one piece and shaped with a dart in the inner elbow. They are quite narrow and would’ve been tightly fitted as was the current fashion. They are sewn in with machine stitches, and the seam allowance was then hand overcast.
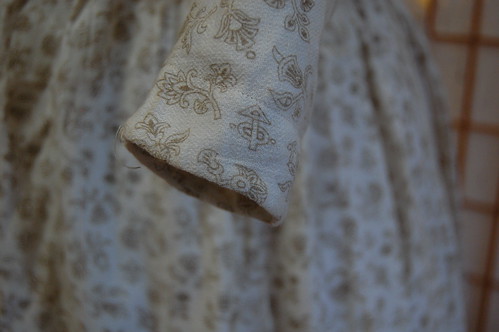
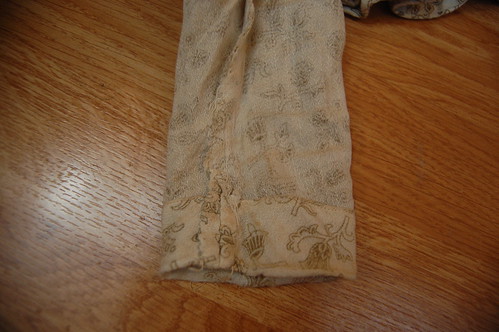
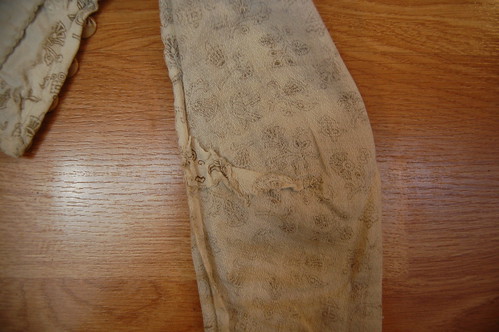
The cuffs are quite interesting. They were hemmed by machine with a wide self hem before the sleeve seams were sewn, and then the seam allowance inside the cuff was hemmed instead of the more usual sew the sleeve seams, hem the cuff method.
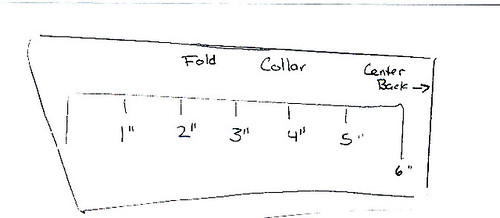
Collar
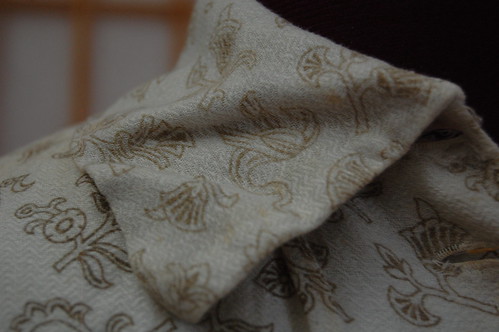
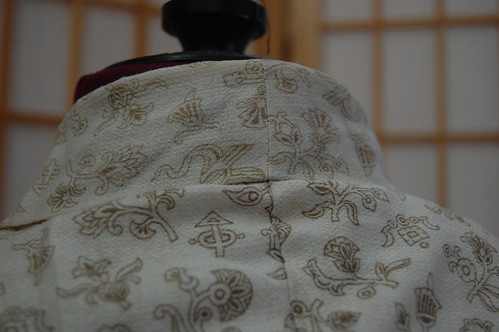

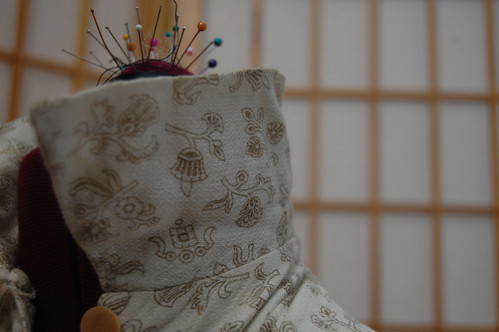
The collar is a fold over collar, similar in style to many of today’s button down shirts. It’s essentially a trapezoid shape with a seam down the center back which gives it a little shaping. It is self lined. The collar was made twice, right sides sewn together around the outer edge, and it was turned right side out.

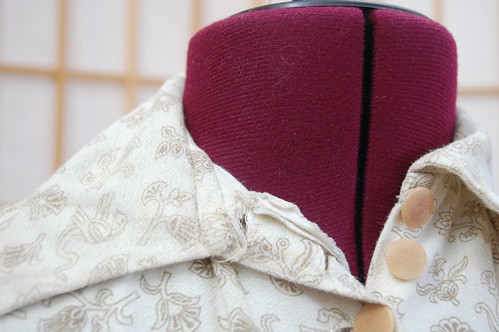

To attach the collar, it was placed on right side of the neckline of the dress, a piece of self bias placed over that, and then it was sewn through all three layers. The seam allowance was then folded towards the bodice and the bias sewn over that, creating a clean finished edge.
Skirt
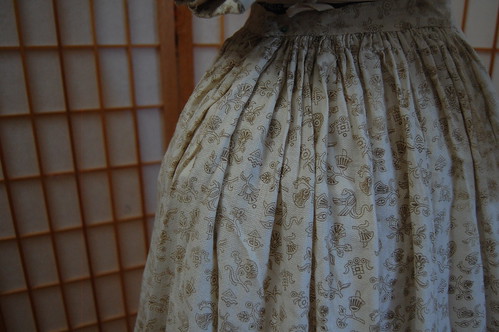
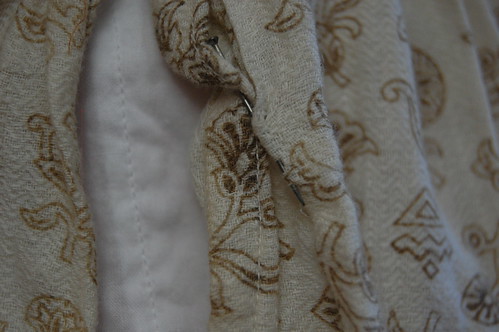
This dress really is a gift to those who always seem to be doing last minute projects. In addition to it being almost entirely machine sewn and the bodice placket being left unfinished, there are no signs of closures at the waist. There is an old pin in the folds of the placket which may have been used as a closure. I looked carefully for signs of a closure that had been removed, but was unable to find any. Though the fabric is a loose weave, it shows stitch marks in other areas, so it would be logical to assume that something as stressful as a closure would leave a lasting mark.
The skirt waist measurement, at (twenty-seven) inches (sixty-eight and half centimeters), is much bigger than that of the bodice and it would have been worn with a rather large overlap.

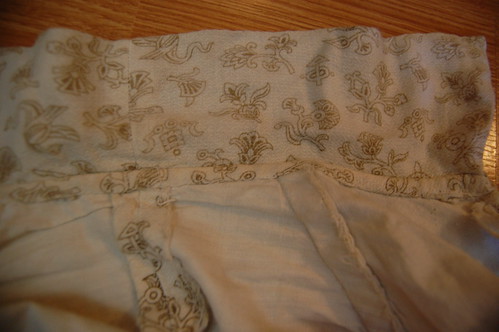
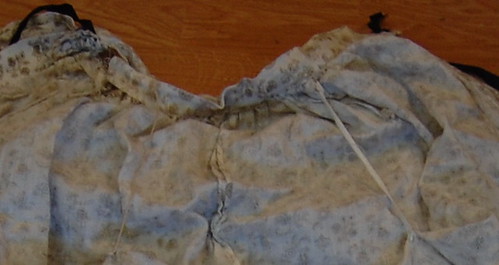
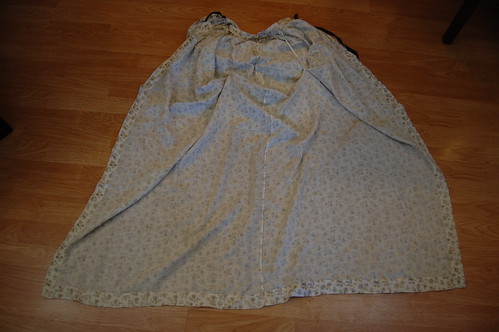
The skirt is made with a gored center panel, two side gores, and a straight center back panel. The center back panel is pieced. It has one full twenty-six inch (sixty-six centimeters) width of fabric with a twelve inch (thirty and a half centimeter) panel attached to that. A ten inch (twenty-five and a half centimeter) slit is cut in the center back as a placket. This was hemmed by hand, and a small pleat was made at the bottom to secure it.
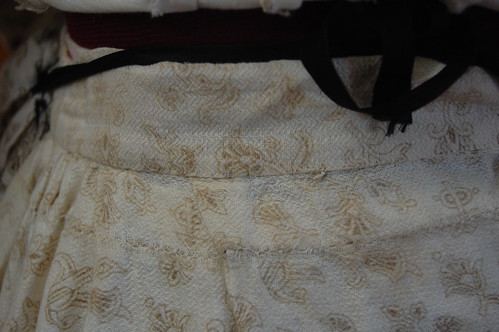

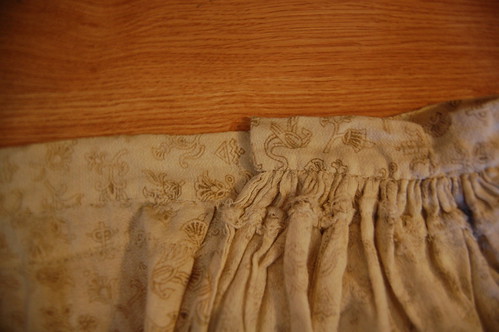
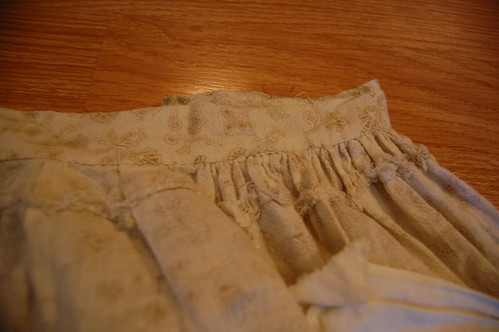
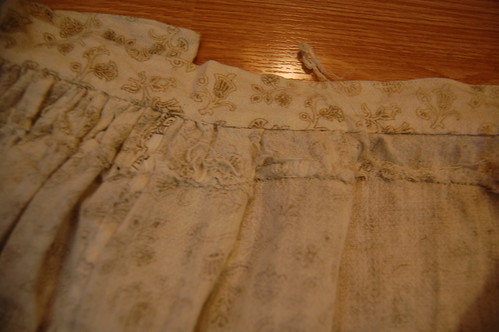
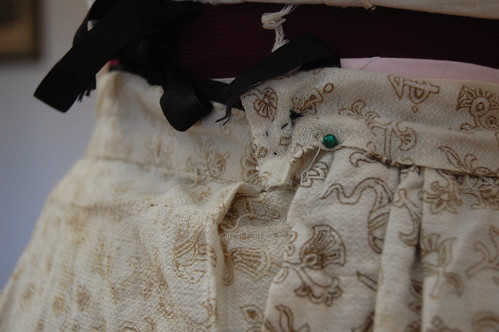
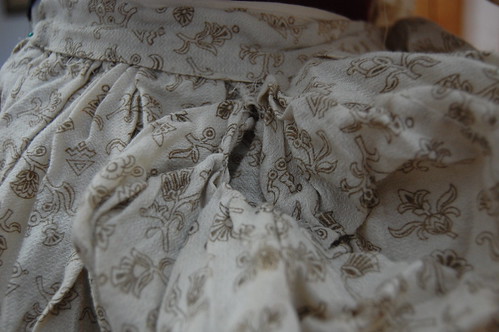
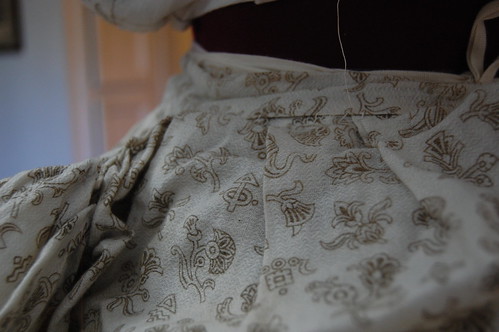
A two inch (five centimeter) strip of fabric has been sewn around the top, presumably to lengthen it. This strip does not correspond with any of the seams. The top of the skirt is folded over. After folding, about three-quarters of an inch (two centimeters) of the fabric shows. The front of the skirt is mostly flat, with four pleats, and the back is gathered as if for cartridge pleating. It was sewn to the waistband by hand. Unlike standard cartridge pleating, it is enclosed in the waistband.

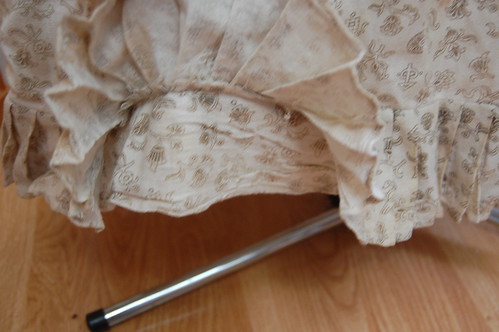
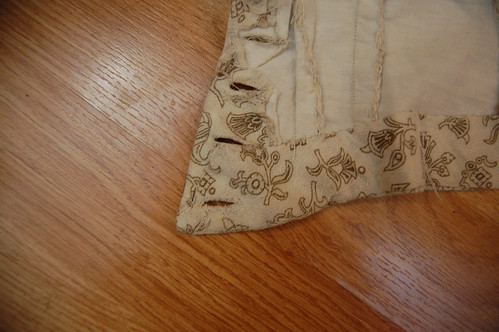
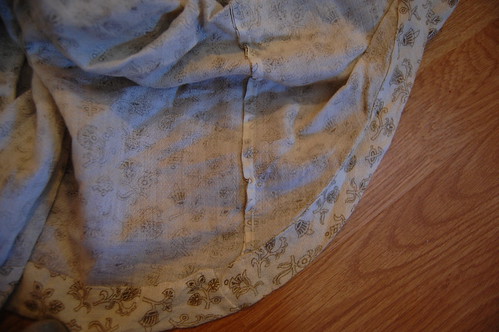
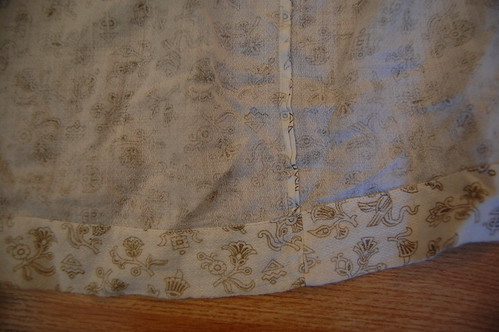
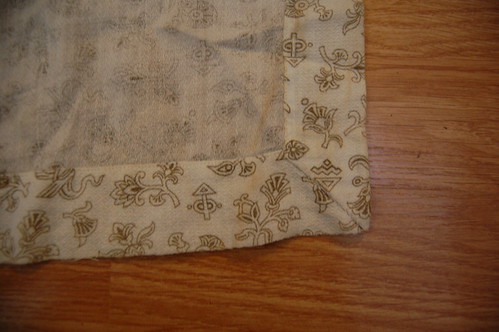
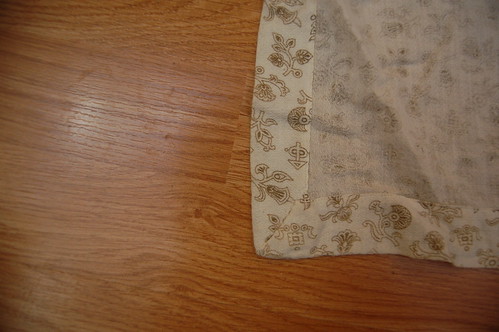
The skirt is hemmed by machine with a wide self hem. The only decoration on the skirt itself is a three inch (eight centimeter) row of knife pleats, which have been hemmed with a narrow machine hem. These pleats were set right side to right side with the skirt with the hem facing up, three inches (eight centimeters) up from the hem, sewn by machine just above the hem, and then allowed to fall over the hem of the skirt.
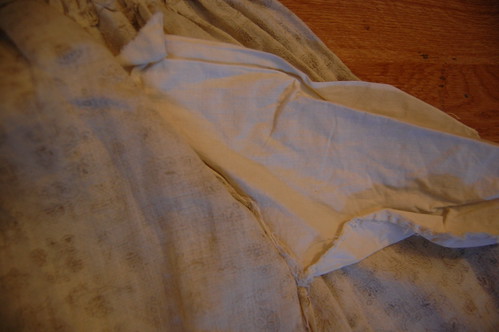
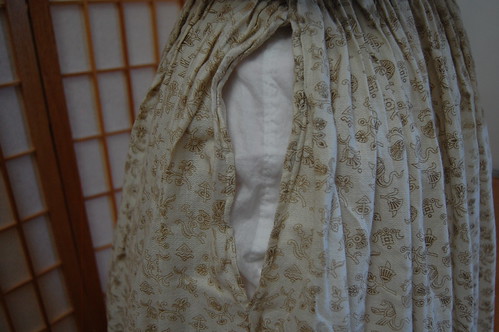
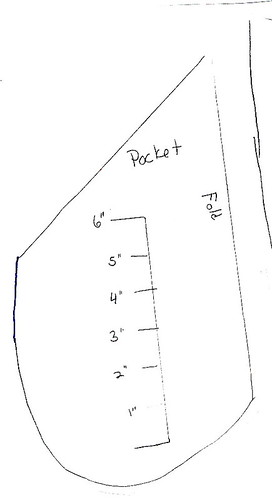
The skirt has a plain white cotton pocket in the left side seam. This pocket would blend seamlessly into white petticoats.
Overskirt
Though front drapery on skirts was nearly universal, there is no front drapery with this dress. There are examples of dresses from this time period without front drapes, so it’s possible there never was drapery originally.
Dress on Pinterest.
Dress at the Met.
Dress at the Met.
The waist measurement of the bodice is small, at 21 inches/ 53 centimeters, so it doesn’t quite fit my dressform when it’s placed at its smallest settings. With the extra two or so inches, the back drapery would cross more to the front, which would give a look similar to the second link.
In addition to the possibility there was originally a separate front overskirt, the overskirt shows signs of alteration, so it is possible there was originally front drapery attached.
The center back seam of the overskirt was originally open as a placket. The sides are hemmed for the first 9 inches and it is now basted shut. In addition, the quality of sewing on the overskirt is not as good as the rest of the dress. This makes me lean towards the dress originally having front drapery. It’s possible that the back pouf was originally front drapery, as the placket would not have worked with the pouf in place as it is. If it was redone though, it appears to have been done with the intention of the dress being worn.
Though I do lean to the idea of the dress having front drapery, sadly, we’ll never know the answer to this question! Happily, the drapery as it stands is quite pretty with interesting construction.

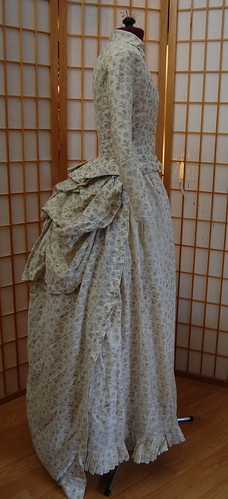
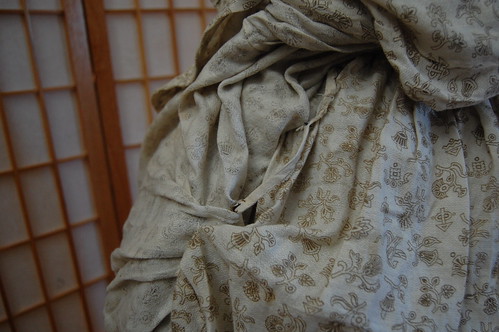
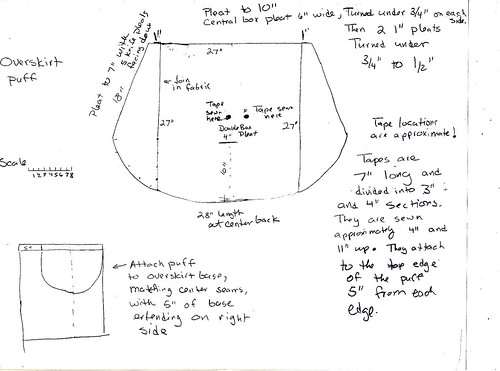
The overskirt consists of two parts—a base and a pouf. The base is a rectangle two widths of fabric wide sewn selvage to selvage down the center. This base has two cords six and a half inches (sixteen and half centimeters) long to pull it up into puffs. The cords are sewn eight and a half inches (eighteen and a half centimeters) down, which is what allows for the puffs. One of the cords is actual twisted cord, the other, one-quarter inch cotton tape.

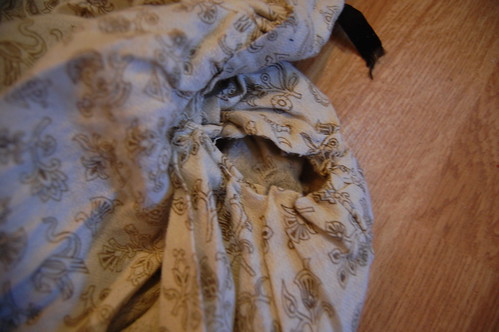
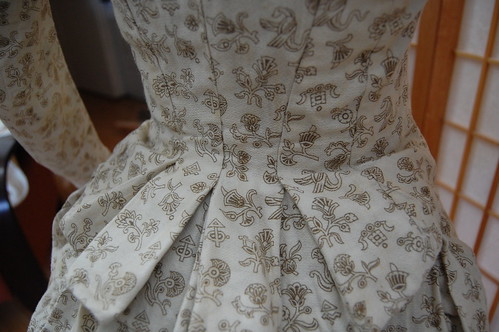
The pouf is a rectangle with a rounded edge made of three pieces of fabric—one width in the middle, with a piece sewn on either side. The straight edges of the sides are pleated, sewn together, and the bottom of the pouf is then sewn to the top edge of the skirt, creating something of a spiral of pleats—almost like the way a seashell radiates.
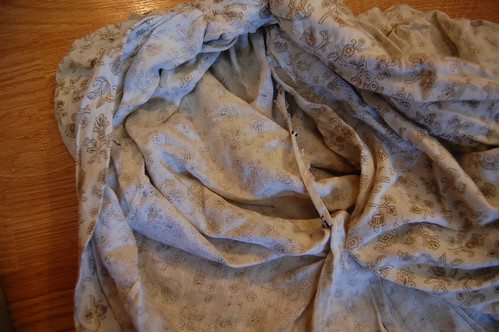

The pouf has two cords, made of strips of fabric folded and overcast together, to pull it up into puffs.
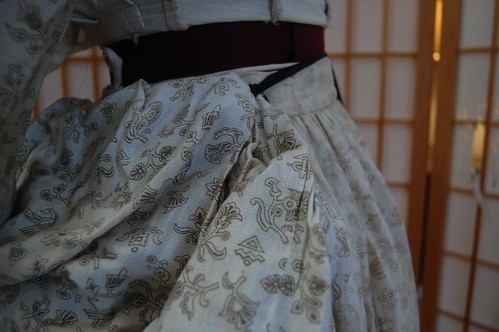
The pouf is then mounted onto the base. It is set off center with the waistband, which creates the asymmetrical look to the overskirt. It is flush with the edge of the base on the right side, and six inches (fifteen centimeters) from the edge of base on the left. When worn with the pouf centered in back, this makes the left side wrap to the front while the left side stops around the hip area.
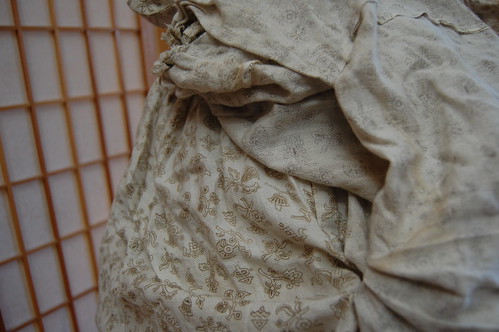
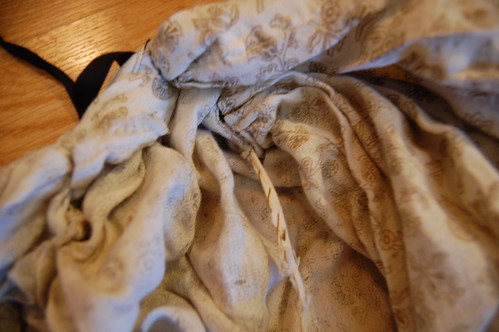
The pouf is sewn to the base skirt in three places. First, where the two cords pull it up, and second, the center section is pleated into a double box pleat four inches (ten centimeters) wide and ten inches (twenty-five centimeters) from the hem and eighteen inches (forty-six centimeters) rom the top of the overskirt. This pleat is basted to the base skirt eight inches (twenty centimeters) from the top, so that it puffs out. (overskirt 3)
Both the base skirt and pouf are hemmed with wide self hems. The corners on the base skirt are whipstiched into place.
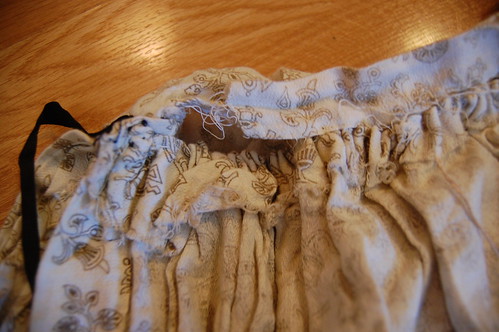
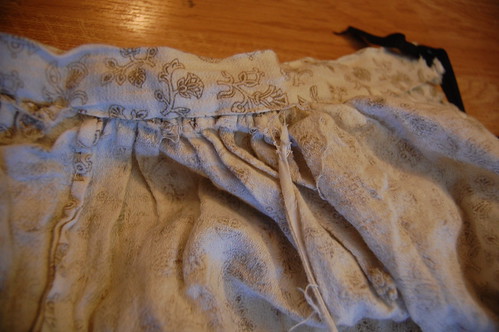
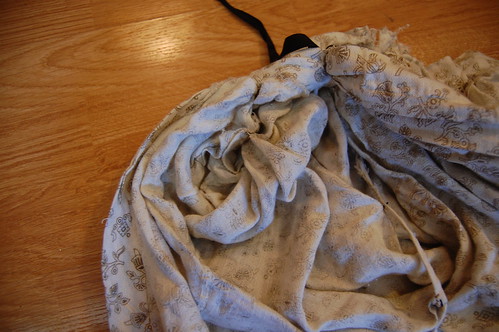
The top edge of the base layer is folded over and gathered as if for cartridge pleating, and the overskirt is knife pleated, with pleats facing away from the center back. These are placed on top of each other, and attached to the same waistband. They are both enclosed in the self-fabric waistband. Much of the stitching has come loose, so it’s possible to see inside the band. It was sewn with a rather loose whipstitch on either side of the waistband.
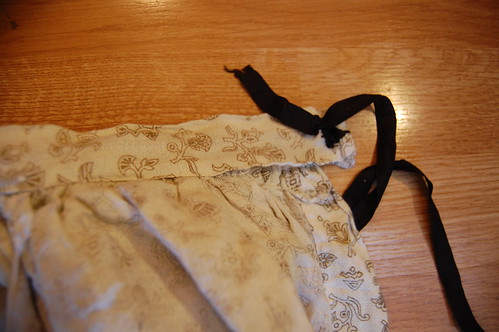
It closes with black ribbons that tie around the waist, which very well may be replacements.
I had the fabric reproduced at Spoonflower and printed onto cotton voile. I made a step-by-step recreation of this—in my size, of course—following all the techniques used in this dress.
Skirt Reproduction
Overskirt Reproduction
Bustle Bodice Reproduction
Finished Reproduction
Pattern

This is a wonderful resource! Thank you ever so much for your hard work!
ReplyDeletehttps://saglamproxy.com
ReplyDeletemetin2 proxy
proxy satın al
knight online proxy
mobil proxy satın al
M5HY2R